tattoos
Showing posts with label General Garden Projects. Show all posts

Tuesday, November 8, 2011

How Did Your Garden Grow? by Donna Duffy


Autumn is the perfect season to step back and reflect on the successes and challenges you experienced in your garden this summer. Grab your garden journal and take a walk around your yard. Jot down detailed notes – your memory may fade over the long winter months. Consider the following:


·      What did you love about the garden this year?
·      Which plants thrived? What did you do to help them thrive?
·      Which plants struggled? What happened to them? What were their precise growing conditions (e.g., how much water, what kind of soil, how much sun)?
·      What insect problems did you encounter? How did you manage those problems?
·      What plants outgrew their space?
·      What do you want to do differently next year?

With these notes in hand, you have several months to research answers to your specific plant problems. The CSU Extension website, http://www.cmg.colostate.edu/ has a wealth of information to help you get answers to your gardening questions. You’ll find downloadable fact sheets to shed light on your most perplexing issues and provide guidance.

The fun part of planning is considering all the options for adding or replacing plants. One of the best resources to find plants that thrive in the Rocky Mountain region is the Plant Select® website: http://www.plantselect.org. Plant Select® is a cooperative program administered by Denver Botanic Gardens and Colorado State University in concert with horticulturists and nurseries throughout the Rocky Mountain region and beyond. The purpose of Plant Select® is to seek out, identify and distribute the best plants for landscapes and gardens from the intermountain region to the high plains.

Jeffco Master Gardeners Kristin Sutton, Jamie Gallagher, Jan Skibinski and Ellen Goodnight
Fair warning: once you open the website, you may find the time slipping by as you click through the plant lists and photos. You can check out the Plant Select®  “winners” for the past year or previous years. You can create your own customized plant list based on your unique growing conditions. There are galleries of landscape designs as well as downloadable designs. You can look at individual plant photos and eye-popping photos of gardens that incorporate Plant Select® recommended plants. You can even find a list of retail suppliers of these marvelous plants.

Next spring, take note of the nearly 90 Plant Select® demonstration gardens to visit and view Plant Select® introduced and recommended plants in real-garden situations. A great place to start is the Jefferson County CSU Extension at the Jefferson County Fairgrounds, 15200 W. 6th Avenue.

Monday, September 26, 2011

A Word on Hypertufa by Judy Huckaby

When a hypertufa class was offered through the Jefferson County Master Gardener program, I immediately signed up to become an instructor.   I learned that tufa is compressed volcanic ash that has been mined for centuries in order to be carved into watering troughs and sinks.  Gardeners began to covet these containers for their rugged looks and soon the troughs became expensive and rare.
Somebody somewhere down the line had a flash of brilliance and came up with a recipe to make garden containers that look and are waterproof like tufa, but are lighter in weight.  Called hypertufa, the prefix “hyper”  can mean excess, exaggeration or above and beyond.  Regardless of the meaning, hypertufa containers are usually planted with “alpine gardens” because they leech alkalinity and these plants can take it.

Duane Davidson’s lovely circular red colored pot.

 That’s not to say that all that can be planted are hens and chicks and things like that.  One of my fellow hypertufanists planted blooming oregano in hers.  And I’ve seen some beautifully planted with other things.

Not satisfied with the standard recipe, I realized that hypertufa  is a concrete mixture.  Concrete is cement mixed with aggregates.  To make traditional hypertufa, the aggregates are perlite and peat moss.  Mix 1 part cement to 1-1/2 parts each of perlite and peat moss, toss with a bit of water and cram into a mold.  Keep covered and moist, wait a curing time of 4 weeks or so, and viola a hypertufa container is born.

The traditional look is gray and so gray cement is used.  I learned about white cement,  a more refined cement product which costs twice as much.  Aggregate can be lots of different stuff:  sand, coffee grounds I am told, vermiculite, aquarium pebbles, the list goes on.  The only thing constant is the ratio of 1 part cement to 3 parts aggregate.    For my latest container, I used white cement, vermiculite, and a finely ground perlite to create a mixture that could be carved a day after it was molded. The texture is a bit different, and it is rather heavy, but to me it still looks like a weathered pot that possibly came from stone (who knows, maybe even tufa).

 
Vermiculite Pot
 The Jefferson County Master Gardeners have taught a very successful workshop on hypertufa.  Participants created a pot about 8 inches wide and long and 12 inches high using cardboard boxes as molds.  In the garden, these containers will provide a little nook where alpine plants can be featured.
The workshop was so successful, that the Master Gardener instructors are debating whether to offer another workshop before Christmas.  Fall is an excellent time to create hypertufa as the pots cure better in cool temps.  Should the workshop come to pass, it would be offered in time to make a container or two for Christmas gifts.  A gift of a handmade hypertufa to a gardener would go a long way in providing holiday cheer.

Needless to say, learning how to make hypertufa has set me on fire for more experimentation.  Rex Murfitt’s garden in Victoria, British Columbia offers me lots of inspiration. (The picture is from Creating and Planting Garden Troughs by Joyce Fingerut and Rex Murfitt, a good read if you want to know everything about making and planting a hypertufa pot).


Monday, July 25, 2011

Patti Douglas – Gardening and Giving by Ellen Goodnight

Patti Douglas "Raised Bed Queen"
Patti Douglas, a Jefferson County CSU Colorado Master Gardener for seven years, could easily hold the moniker of 'Raised Bed Queen' as she tends 20 raised beds in her Wheat Ridge garden. Yet there is much more to this inquisitive and giving gardener.
   
Born and bred in Michigan, Patti was raised on fresh fruits and vegetables from her mother's cooking to produce from an aunt and uncle's farm within biking distance. The seeds of her appreciation for good food and how to grow it were obviously sown in her childhood years.

In 1973, Patti moved to Steamboat Springs, Colorado to ski and lived the mountain life which always included gardening. She moved to the Denver metro area in 1983, attended massage school, got married and had a “darling daughter”, gardening all the while.  Today, Patti still maintains an active Lymphatic Massage practice and teaches Yoga and Tai Chi.   If that's not enough, she is also an artist and a rug braider.


 For the past 22 years, Patti has tested and explored various gardening methods.  Now, rather than planting in our native clay soil, she has perfected the technique of gardening in raised beds.  After trying various box  sizes, Patti has found  2'x3'  wide boxes easiest to garden in.   “I am a short person with short arms.  So I either step into a 4' wide bed or fall into it!”

There are many benefits to raised bed gardening.    Soil problems such as clay soils, or soil with poor  drainage can be avoided by incorporating top soil and five percent organic matter to the native soil of a raised bed.   Soil compaction in the planting area is eliminated with walkways between beds.  By using soaker hoses or drip irrigation in a raised bed reduces  water consumption is lowered  and contained within the growing area.  Mulching raised beds with grass clippings and walkways with wood chips conserves moisture yet reduces weed growth   Raised beds heat up faster in spring, thereby  allowing earlier  planting than in an open garden.   The retained heat and protection raised beds provide allows gardening into late fall and early winter by  covering with glass, plastic or shade cloth .   These benefits  along with higher yields, raised bed gardening is also an  ideal  gardening method for small yards and is handicapped accessible.

 Many of Patti 's raised beds become test plot boxes for new varieties. Her property also supports several different fruit trees, one of which she has experimentally grafted. Patti has continued her explorations by planting cover crops in the winter used as green mulch.  Succession planting and storage varieties of fruit and veggies provide an extended harvest.

Patti's raised bed gardens and a 20'x20' community garden plot produce an abundance of  food. Not only does she raise food for her family, she  generously gives food to neighbors, a local food bank and all  visitors. “No one leaves my home without something from the garden.” Family and friends can hardly wait for Christmas time when they receive  Patti's  gift baskets of onions, garlic, sweet carrots, homemade jams, honey, and in a really good year a melon.   “You know you are special if you make it onto the melon list”.
   
 Gardening is obviously a life long passion for Patti Douglas, but giving is definitely a core value of this warm and generous Master Gardener.

Patti’s garden is one of the featured gardens on the Jefferson County Master Gardeners’ Home Grown Garden Tour  July 31, from 10:00 am. to 3:00 p.m.  For more information about the annual garden tour, call 303-271-6620 or check http://jeffcogardener.blogspot.com for a brochure and map of the tour.

More information about raised bed gardening can be found at http://www.ext.colostate.edu/ptlk/1812.html .

Wednesday, July 20, 2011

How To Make a Worm Farm With Your Kids by Jill Knussmann

Jeffco Extension 4H Cloverbuds  Show Off Wormerys!

In the dog days of summer, take a step into the cool shade to do a project with the kids.  Fact: Kids love worms.  Therefore, what could be better than making a worm farm? Benefits include knowledge gained about nature’s recycling process, nutrient rich worm castings to be used as a soil enhancer, and time shared with your kids. Let’s get started. 


Gather the following items:
2 cup plastic container with lid
Black paper to cover container and tape
Knife for poking holes in plastic container (adults only on this task)
1 cup shredded paper (from a paper shredder ideally, but torn up is fine)
Spray bottle of water
1 or 2 tablespoons of worms (Purchase Red Wigglers from a bait store.  For larger volumes they can be purchased on line.  Red Wigglers can adapt and thrive in captivity, while earthworms will not adapt.  Red Wigglers will not survive Colorado winters, but are fine for summer gardens if you choose to put them outside eventually. )
1 or 2 tablespoons of chopped vegetable waste.  Weight of food scraps should be the same as the weight of the worms.  Worms love melon rinds, fruits and veggies. They like coffee grounds, tea bags, crushed egg shells and banana peels.    They don’t really like citrus, onion or garlic. Worms cannot eat fatty or salty foods or they’ll get sick.  Also, please don’t feed them meat because it can smell bad and put germs in the wormhouse.

Put it together:
Have an adult punch holes in the container’s top, bottom and sides.  4 holes, ½ inch in diameter, on the top, bottom, and side of the container should provide adequate ventilation. (total of 12 holes)  The worms will be attracted to the food and will not crawl out.
Tape black paper over the container to keep it dark.  Worms are shy and like the dark, just like when they dig in the ground.
Place ½ cup shredded paper in bottom of container. 

Spray with water until paper is moist, not soggy.  This is the worm’s bed.  They breathe through their skin and have to stay moist.  Try to keep it fluffy instead of squished into a ball.
Add remaining ½ cup paper 
Moisten remaining paper with water.
Dig a wide hole half of the way down in the paper for your worms’ bed.
Add equal wieght finely chopped food scraps on top of your worms for dinner.  
Put the worms in their bed and cover them up with paper.
Leave them alone
Worms don’t really like to be handled, so wait a week and let them settle into their new home. Next week check on your worms. 
Pull back the covers and see if your worms have eaten all of their food.  If most of it is gone, give them the same amount of chopped up food.  Cover them up again.
Repeat until worms have consumed most of their bedding as well as the food and created worm castings.
Separate worms from castings. Castings are the brown soil-like particles you will see with the worms.  Use the castings on top of indoor or outdoor plants for a nutritious soil supplement. 
Start the process over with your worms.  When you have twice as many worms as when you started, you can use a larger container, or give half to a friend.

If you decide you would like to create a larger worm farm and enjoy a larger volume of castings, please go to http://www.ext.colostate.edu/pubs/columngw/gr070505.html for instructions.

Wednesday, July 13, 2011

Drip Watering Pots and Plant Containers by Gardener Dave


Some years ago I swore off clay pots in my landscaping layout. My reason for this is:  In our dry climate, small clay pots dry out “before you can put the hose away” – especially the unglazed ones.  Glazed pots fare a little better, but beware of the darker colors as they absorb radiant heat and can cook plant roots if they are in full sun all day.

I still like the look of unglazed clay pots, especially in groups with the largest in the center, or large-to-small arrangement. The “Italian style” pots with the thicker rounded rims are my favorites.  Hmmmm… now I’m talking about “my favorite unglazed pots”!  What convinced me to use them again after I had sworn off?


Drip watering on an automatic timer made the difference for me. I still avoid small ceramic pots due to their quick dryout – my smallest is about 11” in diameter and they go up from there.  I always use potting soil and always plant the pots with bright-colored annuals. I fill the bottom 2/3 of the pots with Perlite to avoid using large quantities of potting soil every year. This provides a “moisture sink” that roots can get down into. You can buy Perlite (or equivalent) in large sacks. It isn’t as cheap as empty pop cans or other such fillers, but I do keep it from year-to-year – currently my Perlite base has been in the pots for about 5 years. I fill the top 1/3 with good potting soil that includes some fertilizer. 

Water distribution to each of my drip circuits from the full-pressure timed lines is through a 15 or 20 psi pressure regulator and 1/2” plastic tubing. Small 1/4” tubing goes from the 1/2” distribution tube to the drip hose in each pot, using 1/4” barbed connectors. See pictures below for straight and tee types.


I prefer to use 1/4” “leaky hose” for watering inside the pots themselves. I have tried spot emitters in the past, but prefer the more distributed drip effect of the small hoses.  I use a proportional amount of the leaky hose, depending on the size of the pot.  For the smaller pots I run one turn of the drip hose just inside the rim of the pot, then one across the diameter of the pot between plants.  I use wire “staples” – made for holding down weed barrier cloth – to hold the tubing in place.  In larger pots, I may use two turns of the tubing inside the rim of the pot, with an “X” of tubing across the pot diameter. Also, be aware that some brands of the little leaky hoses are more “leaky” than others. You just have to try them to know the differences.

Mulch (if used) should be applied to the soil over the tubing.  Less water will be lost to evaporation if the hoses are under the mulch. I use my little leaky hoses for several years before replacing them.  I am on Lakewood (Denver) water, but it will depend on the mineral content of your water – more minerals will mean replacement at more frequent intervals, as minerals tend to eventually plug them up. One good thing about using the small leaky hose is that they can be easily cut shorter or spliced if you find that you are watering too much or too little.  Fine tuning is part of the process (it’s a hobby, right?)  Of course, the frequency and duration of watering as set by the timer(s) are basic to the whole drip watering approach. Experiment with these as necessary.  My pot circuits are set to run for 5 minutes every other day. This seems to be adequate even in hotter weather.  Use whatever works for you. Try to group plants with similar water needs on each circuit if you can.

If you successfully fine-tune your drip watered pots, you can go on vacation with confidence, knowing that your pots and containers will be correctly watered. I generally have my system up and totally fine-tuned by the time September is here.  JUST KIDDING!    ;o)

Cheers,
Gardener Dave

Monday, June 13, 2011

Straw Bales Garden by Duane Davidson


(Click on Image for Slide Show of Process)

The idea came from an article in a gardening magazine. I was already changing the way I gardened in the back yard, adding raised beds and converting lawn sprinkler heads into drip irrigation distributors. Why not give a corner over to a small straw bale garden and see what I might grow there? My approach to gardening has always been about trying something new and learning from my experiments. The uncertainties of gardening make it fun for me. Introducing new elements only heightens the challenge.

The author of the magazine article had some specific reasons for creating her straw bale garden – aside from the vegetables she expected to harvest. She utilized a spot in her yard where the soil was so poor she had never grown anything but weeds in it. By the following year it was covered in a thick layer of rich compost "replete with fat and happy worms." She figured she could revitalize another plot with a straw bale garden each year, progressively improving her whole yard.


The instructions were simple. Lay four bales of straw, flat sides to the ground, one end of each bale abutting the side of another, forming a square on the perimeter and another square cavity in the center. I put a layer of rabbit wire on the ground under the bales, to deter any critters from burrowing into the straw from below.

Then I was instructed to sprinkle a granular organic fertilizer on the top surface of the bales, followed by a 2-3 inch layer of compost. The hole in the center was filled with a mixture of compost and top soil (which I had brought in for the new raised beds nearby). The straw bales were to be watered every day for 10 days with a liquid organic fertilizer. I used liquid kelp. This was to "cook" the straw, causing it to start to break down  to better accommodate plant roots.

After 10 days the bales were planted. I put in three tomato plants, two indeterminate varieties on the rear corners of the square, and an early season determinate on one front corner. On the other front corner, I planted an artichoke I had picked up on impulse at the garden center. (One year I experimented with artichokes in a conventional garden; I found they needed a longer growing season than I had allowed for.) The magazine article writer had grown a huge summer squash bush. I decided to seed a couple of winter squash varieties that would produce vines to trail down from the straw bales into the yard. A couple of eggplants I had grown from seed completed the "garden."

The center cavity seemed to invite root vegetables to grow in its deep, rich, loose filling. I opted for parsnips, which have no chance of penetrating the heavy clay of my conventional garden. Because parsnips are slow to germinate, the seed packet always recommends mixing in some radish seeds with them to mark the rows. The radishes germinate quickly and can be harvested by the time the parsnips are getting started. I mixed in seeds of several varieties. I also had on hand some seed for daikon, the long white radish loved and grown in Asia. I figured I had the perfect spot for them and seeded a couple rows.

Then I laid a length of soaker hose over the straw bales, looped it a couple times across the center, and began a schedule of almost daily watering. I continued applications of the liquid kelp several times through the summer.

The results: I harvested fruit from all of the plants except the artichoke, which grew only a few leaves. The tomato plants were not as large as the same varieties growing in the ground, nor did they produce as much fruit. The same was true of the eggplants and squash. I ate the small radishes in my salads, but the parsnips weren't planted early enough to grow beyond the size of a small carrot. The daikons flourished. They grew to the full depth of that center cavity, and when they reached the rabbit wire on the bottom, they began growing upwards, protruding from the surface of the soil.

Some findings:

- In 10 days of fertilizer treatments the straw didn't break down much. The "composting" process probably works better where the climate is not so dry as ours. (The magazine article writer lived in the coastal area of northern California.) When I planted, the holes I made in the straw didn't seem all that inviting for plant roots. There was moisture from the irrigation, of course, and I worked some of the compost from the surface into the straw. Next time I might add some soil, as well.

- For the same reason, even a year later, the straw is not composted. The bales have "melted" a little, but still retain their shape. I expect to replant them again this year. (Because the weather has been so cool, most of this year's planting is still on hold.)

- Typical weeds were not a problem. Those that came with the compost were easily pulled. But the straw produced its own weeds. This was wheat straw and it contained enough wheat seed to keep me pulling wheat grass most of the season.

Straw bale gardening is not a new idea. Seeing mine, an elderly neighbor told me he had tried it once – without success; I didn't question him on his process. On the Internet I found numerous references, some describing variations from the process I followed. Most of the reasons for straw bale gardening are similar to those of my magazine article writer, but there was one I hadn't thought of: it is more accessible to physically-limited gardeners.

I found two other variations I might consider if I repeat my experiment. Some of the writers believe the straw bales should be oriented differently from the way my article writer and I did it. They say the bales should be placed with the strings on the side – rather than on the top and bottom – for better water penetration and to keep the string from touching the ground and decaying. Others say that if the string is plastic or other synthetic, it can be on the bottom and that water penetration isn't much of an issue.

Secondly, some recommend chemical fertilizers high in nitrogen – ammonium nitrate or ammonium sulfate, specifically – to condition the straw for 10 - 12 days prior to planting. Over the course of that period several writers recommend adding more than two cups of the nitrogen fertilizer per bale and conclude with another cup of balanced 10-10-10 chemical fertilizer. I feel sure this would have a significant effect on the composting process, even in our dry climate. Some gardeners, of course, would prefer to stick with organic materials.

Tuesday, May 10, 2011

Planting a Butterfly Garden by Stan Ames


A Vanessa atalanta a.k.a. “Red Admiral”on a Purple Coneflower
Planning a butterfly garden this season?  These techniques will help you plant a successful garden.

Before you invest you time and money in constructing a butterfly garden it is important to know what butterflies are common to your area. Identification of your guest is very important, as each butterfly has preferences for their “Caterpillar Host Plants” and their favorite flowers for a nectar source.

Attracting butterflies then becomes relatively easy. In addition to a place for their eggs and a good source of nectar, butterflies like flowers for some of the same reasons that we do, bright colors with sweet fragrance.


The websites, below have useful photographs to help you identify your visitors and charts that will show you which plants are “irresistible” to which butterfly.
http://coloradofrontrangebutterflies.com/frontrange-checklist - has listings of over 100 varieties with links to photographs and details about most.
http://www.butterfliesandmoths.org/gallery - pictures for identification.
http://butterflywebsite.com/butterflygardening.cfm - chart of plants that attract, by specific butterfly.

In addition to the right choice of flowers you should incorporate a small source of water (a decorative dish) and perhaps a stepping stone or two for warmth.

Your site does not have to be very large, maybe only six to eight feet in diameter but it needs to be protected from wind and receive between four to six hours of sunlight a day.


Could that be a Monarch calling?
Too many look-a-likes to be sure.

In my garden, I used : Blanket flower), Butterfly bush) Tickseed (Coreopsis) – “Early Sunrise”, Purple coneflower (Echinacea purpurea), Sedum spectabile, Zinnias (Zinnia laageana), Petunias and Snowdrift alyssum (Lobularia maritima, but also have Honeysuckle close by. This year I may add Cosmos and Joe Pye Weed.


 Finding a “Butterfly House” ready for use is a challenge, but they are relatively easy to construct.
Use a good quality 3/8” plywood and protect the house with paint or varnish.

Construction is simple and the dimensions are not critical beyond having the height about four times the width. Just use a good quality 3/8” plywood and protect the house with paint or varnish. There is no need to teach your visitors they need to fold up their wings to get in the house. They will know it is just for decoration.


The size and shape of the garden does not need to be large, mine is only five by six feet with a butterfly house in the middle to add a little decoration. The flowers in my garden are indicated below and work relatively well, just keep the flowers bright and base the selection on the specific butterflies you have identified in your area. Again, make sure the garden is protected from the wind!

Friday, April 29, 2011

Adding Raised Beds to Your Garden By Joyce D’Agostino


Those of us who live in the front range of Colorado know that our compacted clay soils are a true challenge to having a successful garden.  In addition to the hard clay, the high pH of our soil
s here and throughout the state due to the free lime that naturally exists also can pose a problem. 

One answer is to add raised beds to your garden. Raised beds allow you to grow your garden vegetables and flowers in quality soil and nutrients that will allow you to get higher yields and better results from your gardening efforts.

If you purchase a raised bed kit, you may notice that many of them are only about 6” deep and most suggest you buy more than one kit for the optimum depth. Outside of some small annuals, most plants want and need a deeper root medium, so you will need at least one more kit, or add purchased railroad ties or similar timbers to give you the right height and depth.

Most garden vegetables such as tomatoes and squash require full sun for most of the day. Check your seed packets or the information included with the plants you purchase to know how much sun is required. For example, if you choose plants that require full sun or sun for most of the day be sure that the placement of your bed will not have partial or heavy shade.

After choosing the location, we raked up all of the bark that was in the area and set it aside. Wood bark should not be incorporated into your soil because it takes a long time to decay  and also ties up the nitrogen necessary for good plant growth. When your beds are completed, you can use the bark to make pathways in between the beds but be sure to not add the bark to the new soil.

The next step is to prepare your soil. The soil in the areas of our planned beds was covered not only with landscape fabric but bark mulch on top. Landscape fabric is often used by gardeners and landscapers to help control weeds, but over time the pores of the fabric become clogged from dust, debris and soil and torn. The result is that the fabric no longer allows the proper amount of air and water and this can stop the beneficial bacteria and organisms in your soil to be present and weeds can penetrate through the tears. It was necessary to remove this worn out fabric and discard it.

Since the soil under this fabric was very compact, we used a pitchfork to loosen and aerate the soil in the area where the beds will be placed.We added some new soil to this area along with a layer of leaves that we saved from the fall. As the plants grow, it was necessary to loosen the soil under these beds so that their roots will not stop at the compacted soil which could act as a hard barrier

The new soil was then added to the beds. Choosing a quality soil is crucial. Take time to read the contents on the bag of soil. If it states vague ingredients such as “organic matter” then you may want to be cautious. If you are in doubt, buy a small bag of the soil that you are considering, open it and and carefully examine the contents. Watch for topsoil that contains a large amount of things like wood bark and chips, rocks and other matter that was used as a filler. A good topsoil will be clean of debris. Many topsoils and composts are not regulated as to their content so can vary widely from high quality to soil that was scraped from construction sites which could contain harmful chemicals, nails, glass and other debris.

There are several good articles that can help you plan your new raised beds and choose the right materials.  Go to http://www.ext.colostate.edu/pubs/pubs.html and click on publications. There are many free fact sheets that can help you with all of your gardening needs. The following fact sheets discuss raised beds and choosing your soil: http://www.ext.colostate.edu/ptlk/1839.html; http://www.ext.colostate.edu/ptlk/1812.html and http://www.ext.colostate.edu/pubs/Garden/07235.html.

Wednesday, April 13, 2011

The Care and Feeding of Outdoor Wooden “Chain Saw” Bears and Other Critters by Stan Ames

For those of us that enjoy these whimsical sculptures, there are some definite guidelines for their care and preservation.

When you buy your critter ask the sculptor what brand and color of spray paint was used to add the contrasting colors to it. Buy the same paint for your own application in current or future maintenance to your new or existing critters.

Where do you buy these sculptures? You can “Google” for them using “wooden chainsaw garden animals” as your search request, or there are several vendors just outside of Manitou Springs or in Nederland.

When you bring home your “pet” from the local game preserve the very first and critical step is to closely inspect the critter for cracks! Cracks, regardless of size, let moisture inside and allow for premature rotting and access for insects. This is important even if you plan to display the statue on a porch or in a covered area.

Sometimes they break the rules!

These cracks should be filled with an adhesive sealant or caulk before placing the creature in your garden. I personally prefer “Liquid Nails” as it usually dries to a color that will, at least, blend with the natural color of the wood.

Fill these cracks as completely as possible using a smaller opening in the nozzle of your adhesive than normal. Larger cracks may make it necessary to press the sealant down into the crack using a tool made from, perhaps, a popsicle stick or similar device.
Once the crack is filled, clean the excess Liquid Nails from the surface of your critter using mineral spirits and several clean cloths. This may take several applications, but the result will be a more invisible repair.

After the sealant cures, 24 hours to several days depending on the size and depth of the crack, use the same paint color the sculptor used to cover the repair. Next apply two coats of your favorite transparent wood treatment to the entire critter. If you have a wooden deck consider using the same treatment as you apply to the deck, just make sure it is transparent so you can show off the grain and contrasts in your statue.

Another major cause of terminal disease for wooden critters is absorption of moisture through the bottom or base of the statue through capillary action. The moisture will eventually give your critter an incurable case of fungus, mold and even insect pests. Therefore it is critical to place the critter on a surface that allows for rapid drainage of rain or lawn sprinkler system water.

NEVER place your critter on bare soil! The best option is to dig a shallow (six inches deep at least) hole approximately half again as large in diameter of the critter and fill it with large and medium size river rock and place your critter on the rock. The idea is to provide rapid drainage of water and not to allow water to accumulate and stand around the bottom of the critter.

In winter you should allow your critter to “hibernate” in a dry cool place like your basement or garage. Snow melt will find its way into the smallest of cracks and the rapid temperature shifts during a typical Colorado winter will cause more cracks to develop and existing cracks to expand.

Wednesday, March 30, 2011

"Perennial" Markers for a Square-Foot Garden by Caroline Reardon


Square-Foot gardens appeal to many of us who love some organization in our plantings. Marked off in square-foot sections, the garden is a visual grid for growing a variety of crops, one in each section. 

In 2006, my husband and I built four wood raised-bed square-foot gardens, and I came up with this system for marking the grids. The twines, stretched for spring planting and loosened for the winter, are still in good shape after five years.


For each 4' x 4' raised bed you will need a tape measure and pencil, one long nail and a hammer (to start every screw hole), 12  11/4"-long wood screws, a  screwdriver (even better is a power screwdriver), and approximately 28' of twisted nylon mason-line twine.
On each side of the wood frame, measure and mark three one-foot intervals with the pencil. 

Inside the wood frame and at a downward angle, aligned with each mark, pound a nail into the wood 1/4"  deep and about 1" down from the top of the frame. (I need this because I'm not too swift with the electric screwdriver and the screw quickly escapes!  Maybe you won't need the starter hole.) Pull out the nail and screw the wood screw into the hole, leaving the head protruding 1/8" from the wood. Do this for all 12 marks in the frame. 

Cut the twine into six 54" lengths. Make a slip knot in one end of a length. Hook this loop over one screw head and stretch it to the matching screw on the opposite side of the frame. Make another slip knot at this end of the twine, forming it so the twine will have to stretch taut, and hook it over the screw head.  Working from the first side, attach twine to the other two screws. Move to an adjacent side and stretch the remaining three lengths of twine to their opposite sides. 

Now you're ready to plant seeds according to their recommended distance within each square. Later, when they're no longer needed, unhook one end of each stretched twine, roll it up and tuck it into the dirt below its first screw. 

With this one-time set up, your perennial twine will grid your garden for many springs to come! 

Sunday, February 27, 2011

Sowing Seed in the Snow!

Here's a cool technique to sow seeds outdoors in the winter by using miniature green houses made of recycled containers.  It looks like it will work in Colorado!


See the slide show and read the how to here!

Friday, November 5, 2010

What to do with all those leaves? by Donna Duffy


We have had weeks to enjoy the beautiful fall foliage, and now we have to figure out what to do with all those leaves carpeting the lawn and yard. It’s best not to leave a thick layer of leaves on the grass for several reasons. A thick layer can block sunlight, reducing turf growth because of the shading effect. That thick layer will also hold moisture, increasing the potential for turf disease. Here area some options for managing all those leaves and keeping them out of the landfills.
 Composting
Leaves are high in carbon, making them a great compost, but they are comparatively low in nitrogen and that’s what decomposing bacteria feed on. You can add nitrogen in the form of fertilizer or fresh green organic matter. Add ¼ to ½ cup of standard lawn fertilizer (without weed killer) per bushel. Or add one part dry leaves with two parts fresh grass clippings or other green garden debris. As you add leaves to the compost pile, moisten them until they are the consistency of a wet sponge. Whole leaves are better for compost than leaves that are shredded or mulched. For more information, check out the CSU Extension Fact Sheet “Composting Yard Waste” at http://www.ext.colostate.edu/pubs/garden/07212.html.

Mulching
Mulching the leaves directly into the turf is simple and a time-saving way to manage leaves. Mulching mowers work best, but almost any rotary mower will suffice. Use safety goggles and an air mask over your mouth and nose to protect yourself from debris and dust (dry leaves mulch better than wet leaves). Set the mower blade at your normal mowing height. If you have lots of leaves, it may require more than one pass. The finer the leaf particles, the more easily they fall into the turf, leaving the grass exposed to sunlight. This is important because fall is an important time for the turf to photosynthesize and store carbohydrates.

Recycling
In Jefferson County, bagged or loose leaves can be taken to the Rooney Road Recycling Center at 151 South Rooney Road. There is a charge for dropping off leaves and other yard waste, but it keeps them out of the landfills. If you take bagged leaves, you’ll need to take them out of the bags at the recycling site. Rooney Road Recycling Center is open 7 days a week except holidays. For more information, call 303-612-6262.

Some municipalities in Jefferson County have their own leaf collection programs. In Golden, yard waste collection will happen the first three Saturdays in November. Call 303-278-8600 for details.  Littleton and Englewood are continuing their annual leaf recycling program at Mountain States Wood Recyclers, 2300 West Radcliffe Avenue in Sheridan. For more information, call the Public Service Department at 303-795-3863.

 Call your local municipality to check on leaf recycling programs this fall. So, don't "leaf" them alone, compost, mulch or recycle!

Tuesday, September 7, 2010

Late Summer in Your Garden by Donna Duffy

It’s September, and Colorado gardeners are busy harvesting their vegetables and enjoying the last blooms of summer. Before all the fall gardening chores kick in, here are some simple September tasks to tackle.


Store Seeds
In Colorado, all vegetable and flower seeds will store on a shelf at room temperature for at least one year without significant loss of germination. The most important factors in determining how long seed can be stored are seed moisture and storage temperature. The drier the seeds are, the longer they will store. Drying seeds in the shade is better than in direct sunlight. Never use a microwave oven to dry seeds. You may use a conventional oven if you keep the door open and the seed is not heated to more than 100 degrees. Package the seed in moisture-proof containers and store it in a refrigerator or deep freezer. Use sealed cans or jars rather than plastic bags.

Harvest Lavender
Harvest lavender stems in the morning when the oils are the most concentrated and at least 50% of the flowers are opened. Use pruning shears to cut the lavender stems as long as possible. Form bundles of 50 to 100 stems and secure them with rubber bands (they will contract as the stems dry out). Dry the harvested lavender in a cool, dark place where there is good air circulation.

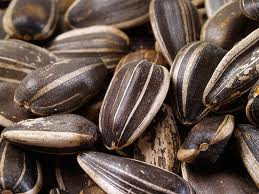
Harvest and roast sunflower seeds! Sunflowers are mature when the back of the head turns yellow and the seeds take on a brownish tinge. If birds begin to pick at the heads before they are mature enough to cut, tie a perforated plastic bag over the head. Pick the heads and hang them upside-down in a warm, dry place. When the head is dry, the seeds separate easily. Be sure the seeds are fully dried before putting them in air-tight containers for storage.

Sunflower seeds can be roasted by heating in a 300° oven for 15 -25 minutes. If salting is desired, soak seeds overnight in a brine of 2 Tbsp salt to 1 cup water. Boil the brine mix for a few minutes and drain. Spread seeds thinly on a cookie sheet and roast in a 200° oven for 3 hours or until crisp. Enjoy! (Source: Planttalk Colorado #1828).

Start a gardening journal. Use it to record what worked this summer, what you want to change, new plants you’d like to try…anything that is fresh on your mind at the end of the gardening season.  Be specific rather than general: for example, “eliminate Primrose and Valerian in front garden” will be more helpful than “get rid of invasive plants.”  If you are like many of us, those details get lost in the hustle-bustle of the holidays and the long, cold days of winter. In the springtime, your journal will be a bridge between fall and spring, and will help you jump start the new gardening season.

Sunday, June 27, 2010

“Babylon HRP5” – Hanging Rotating Planter – Project Update by Gardener Dave


For some of you, this will be the first report on my 2010 spring project. The project is nearly complete.  The solar panel was added the week of June14th and the planter is now rotating exclusively on solar power.  It starts its rotation at ~1.5RPH when the solar panel output exceeds 15V.  Full sunshine directly on the panel produces approx. 21-22V, which I regulate to 12V, then route to the motor. More details are available on earlier reports.
Watering is done via the same steel “pole” that the solar panel is mounted on. Auto-spray occurs at 6 min. intervals, 6 times during one revolution of the planter in the morning. The spray timer runs from 115Vac house power. I find that some manual watering is necessary when the plants grow to the point that their leaves overlap the pots, i.e. the spray runs off.

The planter has room for 48 pots total. There are 4 rows of 12 positions each. 6” pots are used in the top row ( in narrower spaces) and 8” pots are used in all the other rows.  All pots are green plastic. The planting medium is commercial (Miracle Grow) potting soil. The planter inner core is galvanized 1/2” wire mesh, covered with coco fiber. The coco fiber provides some additional humidity and protects the pots from strong winds. Perhaps a short description for this project is:  A teepee-shaped planter that rotates to give equal sun exposure on all sides and allows “vertical gardening” with a relatively small footprint of space. Also, flower grooming is easier with most pots placed at a convenient height.
 The above photo shows the relative placement of the solar and watering pole to the HRP5. The actual distance between them is about 7 feet. The HRP5 legs are set level on the concrete patio.
The canvas cover for the power head on top remains in place at all times. There are 2 circular “shelves” in the power head, one for the motor and speed reduction assy. plus the weight-supporting thrust ball bearing, the other is reserved for some possible auxiliary components, TBD at a later time.

The cone-shaped planter is suspended and supported by 3 steel pipe legs.

The solar power panel and its steel pole mount is shown at the right (Approx. 9”x12”).

A few other details… the mounting of the solar panel is shown below.
The panel is mounted to the crossed PVC frame via an aluminum channel and hose clamps.  The panel was provided with only two small mounting holes in its aluminum frame as it came out of the box.  The cross frame of PVC pipe and fittings is “screwed and glued to suit”, and braced outward from the mounting vertical at the bottom to the desired angle.

The spray head is at the right of the vertical.  The water supply comes up the inside of the pipe and operates at a reduced pressure of about 25psi when the timed valve in the “Control Box” opens.

The Control Box (below) contains the water timer, water valve and 12V voltage regulator for solar motor power. The voltage regulator is mounted in a metal box that has input connectors and monitoring test points for the panel output and regulator output. Needless to say – the watering components must not leak!  The Control Box cover is an inverted transparent storage box, held in place by an ingeniously padded and placed BRICK.  (Ahhhh, technology!)  The box will be mostly hidden by nearby daylily foliage.

Here’s to a successful project – so far anyway.  It has been fun, time consuming, and somewhat expensive. But Hey, it’s only Time and Money, right?  While we’re at it, no jokes about “rotating my crops” please – thank you!  Your other comments and questions  are welcome, however.

I tried to pick plants which would not grow out of bounds for their pots or become “viney” and entangled.  Time will tell if I succeeded

I am still thinking of ways it could be enhanced, such as having soft music coming from under the canvas top cover while the planter is rotating.  I would probably employ an iPod or MP3 player or equivalent with small auxiliary speaker(s).  Hopefully, it will also run from the solar source, so it would be good if it could run on 12V. I would like to have it play relaxing music with a garden or nature theme. It would have to resume playing after a power-down state.

Cheers,
Gardener Dave

Thursday, March 18, 2010

Not So Fast! Gardening Tips for Early Spring by Donna Duffy

Yes, it does feel a bit like Spring outside. And yes, there are signs of life in your yard and garden. As tempting as it is, don’t go full-force into your gardening mode quite yet. Following are some gardening chores you can start right now, and others that you’ll need to wait to begin.

Wait! It’s too early to do these chores.
Pruning roses – it’s just too early to do this now, even if the canes have signs of green. Pruning encourages new growth, and we aren’t out of danger of heavy snow and freezing temperatures. Wait until late April or early May, when the chance of freeze damage lessens. If you have tall canes that have broken unevenly, you can cut them just below the break to prevent them from flailing around in the wind and causing more damage. Do this sparingly.


Don’t remove mulch from your perennials or roses yet. They still need protection from cold temperatures. In fact, if the mulch looks thin in places, you might want to add more or move it back in place if the wind has blown it around.

Don’t assume that your lawn needs to be fertilized. Applying a high-nitrogen fertilizer in April may cause grass to grow too fast, before roots can grow to support the lawn. This makes a lawn less tolerant of summer heat. In most cases, an application of fertilizer in April is not needed when lawns were fertilized the previous fall or if clippings are returned to the lawn. If an April application appears to be necessary, apply the fertilizer at a reduced rate.
Dig in! Do these gardening chores now.
Prune trees and shrubs: Early March is a good time to prune deciduous trees and shrubs (except for birch, maple, walnut, and elm). Remove dead, dying, or unsightly parts of the tree, and branches that are crossed against each other. This is also a good time to prune fruit trees to ensure maximum fruit production. If you suspect that any branches are disease-infected, be sure to sterilize your pruning tools between every cut.


Cut back your ornamental grasses. Small grasses can be cut back with hand tools, on some of the larger grasses you may need to use a hedge trimmer. If so, it will be a dusty job – you may want to wear a nose/mouth mask.

If you didn’t cut back your perennials last fall, you can do that now. Carefully remove last year’s dead growth. Don’t be surprised if you see new growth under all those dead branches and leaves. Once the ground thaws, perennials can be divided and transplanted.


Aerating your lawn in the spring is more beneficial than power raking. It helps improve the root zone by relieving soil compaction while controlling thatch accumulation. Aeration removes plugs of thatch and soil 2 to 3 inches long (the longer, the better) and deposits them on the lawn.

SO! Get on out there and have some fun in the yard!
 

blogger templates | Blogger