tattoos
Showing posts with label Gardener Dave. Show all posts

Saturday, October 15, 2011

A 2011 “Summery” of My Garden and Other Random Observations by Gardener Dave

Sometimes a summary report is useful only to the one who writes it. I hope this one is a bit more informative and even somewhat entertaining. I have used common plant names in most cases. Here goes…

Calibrachoa
Annuals:  I like bright color all summer. It’s not that I look for more work to do – I let the perennials show their stuff, each in their own short season. But when it comes to providing color and consistent bloom, annuals still are the way to go. In addition to choosing bright colors, I go for the ones that require less maintenance.


Deadheading definitely extends the blooming period – some annuals don’t require any deadheading and some are easier to keep trimmed than others. Those that I have indicated with an asterisk (*) are not hard to deadhead, but they do need it very frequently.

No Deadheading Required    Easy to Deadhead            “A Pain” to
                                                                                         Deadhead

Wax begonia                         Salvia                                 Petunias
                                                                                        (get “rangy”)
Calibrachoa                           Marigold                           Cosmos*
Vinca                                     Snapdragon                       Calendula*           
Nemesia                                 Canna lily                         Coreopsis*
Scaevola (Fan Flower)          Dahlia                              Carnation relatives*
Moss rose                               Zinnia                             Blanket Flower*

Scaevola
  I have a lot of respect for the annuals listed in the “No Deadheading…” column above. Most are also prolific bloomers, so I plant them every year. Give them regular watering, good drainage and a bi-weekly fertilizing and they will perform. The little Wax Begonia with brown leaves is a favorite of mine. They will do well in full sun, part sun or light shade. The “Callies” (Calibrachoa) are also called “Million Bells”. If you don’t let them go dry or sit with wet roots, you will see why!  They do well in my large pots. I no longer plant petunias because I like the Callies much better. A favorite Nemesia of mine is Sunsatia “Cranberry Red”, try it in a pot, it will overflow with small red flowers all summer. Scaevola (Scaevola aemula) is also great in pots, flowering and expanding all summer even in extreme heat. Their five-petaled flowers are fan shaped, thus their alternate name, “Fan Flower”.

Perennials:
I find myself growing lazy as my years accumulate, ergo: I have added quite a few perennials to my garden. Some show off quite early, such as spring bulbs.  Most “do their stuff” in the May-June or June-July time period and then are done for the year. I have tried to add several which bloom in August-October when others are done.  Some observations from my garden, good and bad: 
"AVA"

Aagastache "Ava"

  Agastache “Ava”
– that seeded itself in my gravel garden path – did better than the same plants in the regular perennial bed.  I have always suspected that a certain amount of neglect is “beneficial”, or at least that plants that grow from seed often do better than those purchased as nursery stock and given loving and tender care!

Northern Sea Oats
– An attractive plant that resembles bamboo – has interesting flattened seed heads that appear in late summer. I have had a couple of these over the years.  A word of warning however, if you don’t want them springing up all over your beds, trim off the seed heads in late fall. They re-seed with a vengeance!

Red Birds in a Tree (Scrophularia macrantha)
  – These were a 2008 Plant Select item. I planted these in three different spots in different beds. One did not receive enough sun due to a linden tree that did very well this year. Another did not seem to like the soil I put it in (too wet?). A third one was in a spot next to my agastache which gets all morning sun with perhaps too-high temperatures? All had improved soil at planting time. None have done well. I believe these are penstemon relatives. Perhaps too little neglect?  Any suggestions?  :o(

Joe Pye Weed
– I planted two of these toward the back of my garden this year. I have a neighbour who has  a large specimen that seems to “bloom” most of the summer into autumn. They make a good background.

Torch Lily (Kniphofia)
– I planted these years ago in a spot not far from a fire hydrant on the corner of my front landscape. It now tries to overwhelm the hydrant, so I cut it back and will probably be moving it next spring.

Large mushrooms
– sprang up in several spots in my flower beds after rains in the early summer. I didn’t consult anyone about their edibility, I just got rid of them before the spores matured (I hope).  I’m sure Jeffco Master Gardener (and Mushroom Expert) Tom Taggert could have told me exactly what they were.

California Fuschsia
   Zauschneria (Epilobium) – Now called “California Fuchsia” (don’t ask me why) has made a very good ground cover on a hot southwest-facing slope in my rock garden. No other ground covers that I know of have such attractive red trumpet-shaped blooms that last from July thru September. I want more of it next year!

Wildlife:
Fox – I have a “foxhole” passageway under my back fence. There have been fox in my neighborhood for many years. A pair used to sun themselves on the roof of my neighbor’s tool shed. About 4 years ago I observed three little ones chasing each other around a tree and fountain in the back corner of my yard. They are cute and entertaining, never seem to do mischief in my yard, other than digging that one hole, apparently to allow the little ones through for their training exercises. The adults leap the fence with very little effort. I once saw an adult fox sitting in the middle of my street, regarding a young human mother who was walking with her baby in a stroller. The baby was sucking on a bottle. I assume the fox wasn’t thinking about “a meal on wheels”, but he might have been thinking “Why doesn’t the mother teach her kid how to hunt, as I have to do with my own youngsters?”

Squirrels – The squirrels use the cables and utility wires that span my back yard as “Interstate Highways”. It’s fun to watch them zoom across singly and in small groups. One day I saw two groups meet, headed in opposite directions. I wondered if they would fight, but one (submissive?) group got around the other by hanging upside down and traversing the wire beneath the other group very quickly. No road rage at all! We drivers can’t pass beneath other traffic, but maybe we could learn something from this episode?

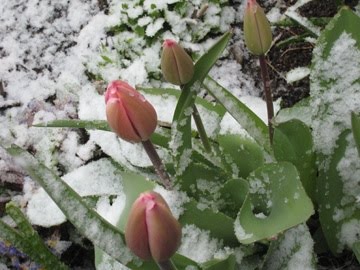
Deer – Three or four years ago, I couldn’t raise tulips in my front yard. The deer would eat them down to the ground.  So – the only bulbs I planted were Daffodils, which they don’t eat. The tulip bulbs are still in the soil and this spring they somehow did very well. The deer were nowhere to be seen. Did they have an abundance of things to eat in the wild this year without having to visit the suburbs?

Anyway… some things to think about over the winter season!

Happy Autumn, and Cheers!

Gardener Dave


Friday, September 23, 2011

Wintering-Over Mandevilla Vines by Gardener Dave


Have you ever tried to winter-over a Mandevilla vine  (Mandevilla spp.) indoors?  I am trying it this year and would like to pass on information and tips I have (recently) researched on the Internet. The info below is a compendium of that information. Since they can be quite expensive, it may be worth your while to try it.

Mandevilla vines are sold by nurseries and “big box” stores throughout the summer. They are showy plants with trumpet-like flowers in many attractive colors. They are a tropical plant, only hardy to Zone 9 and above. If they are grown in hanging containers or in medium sized pots on the patio, they can be cut or pinched back to maintain the desired size. However, if it is happy in your location, i.e. sunny and warm, it will vine, and will need a large pot and some sort of trellis. It will thrive outside with regular, even watering, being careful to not let the soil get soggy. It needs well drained soil and light fertilizing at regular intervals when actively growing. They are moody if temps drop much below 60 degrees, and will NOT tolerate temps much below 45-50 deg. 


If you pot it in a container on the patio, the container should be of adequate size to support good root growth and not be heavy. Resin pots can be quite large and still be lightweight – an advantage if you move it or take it in for the winter. The soil should be a good quality, light, porous potting medium. Make sure the pot has adequate drainage, cut more holes in the bottom if needed.

Some people treat Mandevillas as an annual, but they can survive inside in a sunny spot. Trim them back to about a foot tall, and leave them in their original container if possible. Take them in well before the danger of frost in the fall. Water them evenly, but keep them on the semi-dry side all winter. If new vine growth emerges after it is taken indoors, it will probably not bear any flowers. Since the plant likes bright sun, it will tolerate winter indoors but will not be truly happy unless your “indoors” is a greenhouse!  Be sure to get rid of any insect pests before bringing them inside. An indoor temp of 65-75 deg should be quite satisfactory.

The crown and roots of the plant should survive the winter indoors with the above care, but don’t panic if most (or even all) of the leaves become mottled and/or fall off.  It will NOT be a showy, flowering indoor plant for you even if you put it in a sunny window. You are just aiming for survival until spring, when it can be set outside again after all danger of frost is past. Wintering-over can be worth it, especially if it is a large plant, as they can be quite expensive to replace.

Prune your plant(s) in the spring, before new growth appears, if possible. Cut them back to within and inch or two of last year’s woody growth. New growth should appear as soon as they are receiving adequate sunlight and warmth when set out. If you need to repot, do it at this time, using the next bigger pot size.


 Mandevillas can have pests. Whitefly, mealybugs, spidermites, scale and aphids are possible “guests”.  Keep your eye out for any of these, especially when bringing them in from outdoors, or when they are close to other plants you have brought in.

With some luck and the above winter care, they will bloom profusely outside next year for you, and for years to come.  Bon jardinage !

Cheers,
Gardener Dave


Wednesday, July 13, 2011

Drip Watering Pots and Plant Containers by Gardener Dave


Some years ago I swore off clay pots in my landscaping layout. My reason for this is:  In our dry climate, small clay pots dry out “before you can put the hose away” – especially the unglazed ones.  Glazed pots fare a little better, but beware of the darker colors as they absorb radiant heat and can cook plant roots if they are in full sun all day.

I still like the look of unglazed clay pots, especially in groups with the largest in the center, or large-to-small arrangement. The “Italian style” pots with the thicker rounded rims are my favorites.  Hmmmm… now I’m talking about “my favorite unglazed pots”!  What convinced me to use them again after I had sworn off?


Drip watering on an automatic timer made the difference for me. I still avoid small ceramic pots due to their quick dryout – my smallest is about 11” in diameter and they go up from there.  I always use potting soil and always plant the pots with bright-colored annuals. I fill the bottom 2/3 of the pots with Perlite to avoid using large quantities of potting soil every year. This provides a “moisture sink” that roots can get down into. You can buy Perlite (or equivalent) in large sacks. It isn’t as cheap as empty pop cans or other such fillers, but I do keep it from year-to-year – currently my Perlite base has been in the pots for about 5 years. I fill the top 1/3 with good potting soil that includes some fertilizer. 

Water distribution to each of my drip circuits from the full-pressure timed lines is through a 15 or 20 psi pressure regulator and 1/2” plastic tubing. Small 1/4” tubing goes from the 1/2” distribution tube to the drip hose in each pot, using 1/4” barbed connectors. See pictures below for straight and tee types.


I prefer to use 1/4” “leaky hose” for watering inside the pots themselves. I have tried spot emitters in the past, but prefer the more distributed drip effect of the small hoses.  I use a proportional amount of the leaky hose, depending on the size of the pot.  For the smaller pots I run one turn of the drip hose just inside the rim of the pot, then one across the diameter of the pot between plants.  I use wire “staples” – made for holding down weed barrier cloth – to hold the tubing in place.  In larger pots, I may use two turns of the tubing inside the rim of the pot, with an “X” of tubing across the pot diameter. Also, be aware that some brands of the little leaky hoses are more “leaky” than others. You just have to try them to know the differences.

Mulch (if used) should be applied to the soil over the tubing.  Less water will be lost to evaporation if the hoses are under the mulch. I use my little leaky hoses for several years before replacing them.  I am on Lakewood (Denver) water, but it will depend on the mineral content of your water – more minerals will mean replacement at more frequent intervals, as minerals tend to eventually plug them up. One good thing about using the small leaky hose is that they can be easily cut shorter or spliced if you find that you are watering too much or too little.  Fine tuning is part of the process (it’s a hobby, right?)  Of course, the frequency and duration of watering as set by the timer(s) are basic to the whole drip watering approach. Experiment with these as necessary.  My pot circuits are set to run for 5 minutes every other day. This seems to be adequate even in hotter weather.  Use whatever works for you. Try to group plants with similar water needs on each circuit if you can.

If you successfully fine-tune your drip watered pots, you can go on vacation with confidence, knowing that your pots and containers will be correctly watered. I generally have my system up and totally fine-tuned by the time September is here.  JUST KIDDING!    ;o)

Cheers,
Gardener Dave

Monday, July 11, 2011

“Distract-itis” by Gardener Dave


“Distract-itis”

When doing our day-to-day gardening chores,
other needs often “jump up and bite us”
They keep us from making our normal rounds
and give us “distract-itis”

How many times on your morning “rounds”
to check beds for weeds and for water,
have you seen the signs of other needs
that you “must do”, or certainly “oughter”?

Most of these days I don’t even get
to those chores I first wanted to do,
for this bed chokes out a “Weed me first!”,
and that one nags “Aphids to shoo!”

This can go on, all through the whole day
and when the evening dark gathers,
I think of my list, and find that I’ve done
the “musts” and forgotten the “rathers”

Now I know this is a common “disease”
which plagues us, and makes us cuss
Most others agree - whatever their tasks -
big distractions are ever around us

So we must all sigh and just carry on,
and tend to those things that fight us
We all are victims of this “blight”
that I choose to call “distract-itis”

Cheers,
Gardener Dave

Monday, April 11, 2011

Cutting and Disposal of Tall, Dry Ornamental Grasses by Gardener Dave

Many ornamental grasses grow quite tall, to 5 feet and even much taller. They can remain quite attractive during the winter in their erect dry state, unless the snow breaks them down. Then they become messy. However, they can be cut down and disposed of after they are dried, in the fall, winter or early spring.

Handling these long dry grasses once they are cut off can be very messy, as the dry blades are pesky to chase and pick up, especially if it’s windy. Why chase loose blades when there is a better way?


Bundle them before cutting, using long (approx. 3-foot) plastic “Zip Ties”. These are available at the “Big Box” stores such as Home Depot or Lowe’s in packages of 10 or so.  You can put two or more of these ties together end to end to make an even longer tie if you need it for really big grass clumps. Place the ties about halfway up the grass bundle. Tighten them gradually as you cut through the stalks – I prefer using an electric hedge trimmer for cutting at about 4-6 inches above the ground – and you will wind up with a tight, compact bundle that is easy to handle and dispose of. 

The long plastic ties are not cheap, but they can be removed and re-used, and the bundles tied with twine, etc. for disposal.  After tying the bundle tightly with something else, insert the tip of a small flat screwdriver into the plastic tie where the “zipper” locks, and it can be easily “unzipped” and removed for re-use. 

I prefer to leave a shorter, cheaper plastic tie on the bundle if my trash pickup will be several days in the future. The plastic tie can be easily re-tightened if the bundle shrinks, whereas cord or twine is not that easily re-tightened and may allow much of the dried grass to slip out when someone tries to pick it up later.

I hope you find this “grass handling hint” useful. I have chased too many loose dry ornamental grass leaves all over my yard in the wind to do this job any other way!

Cheers,
Gardener Dave

Wednesday, March 9, 2011

“Non compost mentis” by Gardener Dave

I don’t abhor most garden chores,
not even the raking of leaves
But there’s one thing I do not do
It’s one of my favorite peeves

Organic gardeners, throw your darts
and tell me I’m not being Green
But I just can’t save up everything
for a turning-barrel and screen

Some compost everything they have
including their table food scraps
But I will buy my compost “done”
from a nearby Nursery, perhaps

I won’t have to remember to turn it
and keep it’s temperature high…
not even remember to keep out things
which have pesticides that I apply

I’ll shun the “delight” of making my own
I’ll just buy some, and plant me a tree
I like to do many things that are Green
but composting is not one for me

Cheers,
Gardener Dave


Note: The title of my poem is not original with me (shame, shame!). One of those who beat me to it is the author Darrell Schweitzer, who wrote: Non compost mentis: “An affrontery of limericks and other eldritch metrical terrors” (sound interesting?). There are no doubt other aberrations of non compos mentis, but I’m too lazy to look them all up, and your interest is probably flagging anyway. :o)

Sunday, September 26, 2010

Gnome- Gnapping? by Gardener Dave


A recent article in the Denver Post about kidnapped lawn gnomes prompted me to dabble a bit more into “Gnome Incidents” in other places and at other times.  Apparently they are popular – it’s almost a cult thing!   Stolen or not, they really are hot!  According to the Post article, one home in Arvada had nearly 150 gnomes stolen in late July of this year!  A couple of other links to gnome information and incidents are included below.

Hmmmmmm…  Scientists have done a lot of work sequencing the human genome – I wonder if anyone is working on the gnome genome?  It should be interesting – and strange!
Hey out there!  Do any of you bloggers have more “Gnome Capers” to share with us? 

www.usatoday.com/news/offbeat/2006-11-03-gnome_x.htm
www.en.wikipedia.org/wiki/Garden_Gnome_Liberationists

(My poem below has a rather strange meter (rhythm) to it, but gnomes are rather strange too, right?)

A Poem for Gnomes

All hail to the proud “Garden Gnomes”,
adorning the landscape of homes

Art object (or not)
they stay in one spot,
don’t complain if their hot,
and watch over all they can see

They really are popular themes,
even posing in some magazines*

Whilst I’m walking my Beagle,
past yards humble, or regal,
– anywhere that they’re legal –
they pop up ‘midst flower and tree

They add to the ambiance there,
no matter what colors they wear

Each one is a true little guard,
protecting the house and the yard,
letting nothing get trampled or marred
Unless they are “GNOME-GNAPPED”, you see !


*Gnomes are regularly shown in garden and travel magazines, including in Travelocity ads.

Cheers,
Gardener Dave

Monday, August 30, 2010

Gerbera Daisies by Gardener Dave


With their large, bright, color-crayon-colorful “Daisy” flowers, wide “spinachy” leaves and upright attitude, healthy Gerberas, Gerbera jamesonii (hybrids) are an asset to the garden in beds or in pots.  They are rated by some nurseries as “Impulse Buys”, due to their showy nature.  Ooookay!  Sure, I can grow those – they look so healthy and easy!  I can accept that they are an annual here!


To be brutally honest, I’ve never had a lot of success with Gerbera’s.  For me, they either burn from too much of our high-altitude sun, or they get powdery mildew on their broad leaves (lots!), or they just quit blooming, or all of the above.  I think I have concluded that they can be “touchy”!  Soooo… having now done some more research, I am trying them again this late summer season, starting with 4”potted, brightly-colored, healthy ones, bought at reduced prices.  I will treat them per my newfound advice and see what happens. I am inviting your comments re: experiences you have had with them, maybe we can all learn something about growing these spectacular flowers!

 My Summary of Cultural Information from Various Sources:

Things to avoid
  • Wet, poorly drained soil
  • Crowns below soil level
  • Hot (especially afternoon) sun
  • Pests: Thrips, leaf miner, spider mite, caterpillar, botrytis, powdery mildew, fungal rot and crown rot.
More Tips - From Greenhouse Growers
  • Light - Gerberas require high light intensities for good-quality plants and high flower bud numbers... Plants receiving too little light have pale green, stretched foliage and long, weak flower stems. Plants receiving too much light have compact, slightly yellow foliage with short flower stems often hidden in the foliage. (Morning sun or filtered sun is best in our location).
  • Watering - Gerberas should receive a thorough watering and then be allowed to dry somewhat. This discourages soil-borne diseases. Gerberas should never be allowed to wilt, however. Plants allowed to dry out too much and too frequently have short flower stems that may be hidden in the foliage. It is also a good practice to water early in the day so the foliage is completely dry before evening.

  • Diseases - Powdery mildew, Phytophthora (crown/root rot), Botrytis, impatiens necrotic spot virus, and bacterial blight are the main disease problems of gerberas. (Do not overcrowd plants).
Typical Greenhouse Culture: Indirect or filtered sun, with well-drained soil mix. Many greenhouses use a soil mix consisting of 2 parts peat moss to 2 parts sand to 1 part loam. During the growing and blooming seasons, the plants are watered and allowed to dry slightly. Too much water can cause crown rot. Plants are fertilized monthly with a balanced fertilizer, especially during blooming. Spent flowers should be trimmed off. Crown rots and many fungal vectors can attack the plant if they are kept too wet.
Some Common Problems and Probable Causes
  • Foliage too large or flower stems too long:
    • Light intensity too low
    • Ammonium fertilizer too high
  • Flower stems too short:
    • Plants too dry
    • Soluble salts too high
    • Growing temperature too cold
  • Flowers distorted:
    • Mite or thrips problem
    • Soluble salts too high
    • Temperature too high or too low
  • Plants stunted or failing to grow:
    • Drainage or aeration poor; plants too wet
    • Soil temperature too low
    • Plants planted too deep
  • Plants wilting or dying:
    • Plants planted too deep--crown rot develops
    • Root rot
Other Gerbera Observations from Various Sources - Since Gerberas have been extensively hybridized, they may occasionally exhibit some “eccentricities” such as distorted flowers or leaves – however, newly sprouted leaves or flowers can be entirely normal on the same plant. (I was going to make a comparison with King Tut’s ancestry here, but I won’t.)  Flowers that are blooming on the plant when purchased will frequently wilt or die when plants are transplanted to new locations/environments. Newly sprouted flowers should be OK.

Historical Background…  (If you’re interested enough to care. This came from several online sources)
Common Names: Gerber daisy, Transvaal daisy, Barberton daisy, African daisy
Family: Asteraceae/Compositae (aster/daisy/sunflower family)
Gerberas have approximately 30 species in the wild, extending to South America, Africa and tropical Asia.  They were discovered by Scotsman Robert Jameson in the 1880’s near Barberton, South Africa. It was named in honor of the German naturalist Traugott Gerber, a friend of Carolus Linnaeus, who is known as the father of modern taxonomy (sorry, no connection to the Gerber baby food company).  Jameson donated plants to the Durban Botanical Gardens, and the curator of the gardens, John Medley Wood, sent specimens to Harry Bolus in Cape Town, South Africa, for identification. Bolus then sent specimens to the Royal Botanical Gardens at Kew in England, with the suggested scientific name Gerbera jamesonii.  Beginning about 1890 in England, Richard Irwin Lynch carried out breeding programs that resulted in many improvements. Gerberas soon became popular in the Netherlands, where much of the modern breeding has been accomplished. Gerberas were not produced in North America until the early 1920s. Extensive breeding at the University of California at Davis during the 1970s led to many plants suitable for garden use. However, breeding in Florida and Europe focused on developing long-stemmed cultivars for greenhouse cut flower production. In fact, much of the production today in Europe and Japan is for cut flowers.
In the U.S., California and Florida are the leading states in the production of cut flowers and tissue-cultured stock. The majority of cut gerberas, however, come from Columbia and surrounding countries in South America, with substantial quantities coming from the Netherlands. Current breeding strives for vigorous growth, compact habit, and continuous flowering on sturdy stems. The domesticated cultivars are mostly a result of a cross between Gerbera jamesonii and another South African species, Gerbera viridifolia. The cross is known as Gerbera hybrida. Thousands of cultivars exist. They vary greatly in shape and size. Colors include white, yellow, orange, red, and pink. The center of the flower is sometimes black. Often the same flower can have petals of several different colors. It is the fifth most-used cut flower in the world (after rose, carnation, chrysanthemum and tulip).  Gerberas are attractive to bees, butterflies and birds, and are resistant to deer.
Cheers,
Gardener Dave

Sunday, June 27, 2010

“Babylon HRP5” – Hanging Rotating Planter – Project Update by Gardener Dave


For some of you, this will be the first report on my 2010 spring project. The project is nearly complete.  The solar panel was added the week of June14th and the planter is now rotating exclusively on solar power.  It starts its rotation at ~1.5RPH when the solar panel output exceeds 15V.  Full sunshine directly on the panel produces approx. 21-22V, which I regulate to 12V, then route to the motor. More details are available on earlier reports.
Watering is done via the same steel “pole” that the solar panel is mounted on. Auto-spray occurs at 6 min. intervals, 6 times during one revolution of the planter in the morning. The spray timer runs from 115Vac house power. I find that some manual watering is necessary when the plants grow to the point that their leaves overlap the pots, i.e. the spray runs off.

The planter has room for 48 pots total. There are 4 rows of 12 positions each. 6” pots are used in the top row ( in narrower spaces) and 8” pots are used in all the other rows.  All pots are green plastic. The planting medium is commercial (Miracle Grow) potting soil. The planter inner core is galvanized 1/2” wire mesh, covered with coco fiber. The coco fiber provides some additional humidity and protects the pots from strong winds. Perhaps a short description for this project is:  A teepee-shaped planter that rotates to give equal sun exposure on all sides and allows “vertical gardening” with a relatively small footprint of space. Also, flower grooming is easier with most pots placed at a convenient height.
 The above photo shows the relative placement of the solar and watering pole to the HRP5. The actual distance between them is about 7 feet. The HRP5 legs are set level on the concrete patio.
The canvas cover for the power head on top remains in place at all times. There are 2 circular “shelves” in the power head, one for the motor and speed reduction assy. plus the weight-supporting thrust ball bearing, the other is reserved for some possible auxiliary components, TBD at a later time.

The cone-shaped planter is suspended and supported by 3 steel pipe legs.

The solar power panel and its steel pole mount is shown at the right (Approx. 9”x12”).

A few other details… the mounting of the solar panel is shown below.
The panel is mounted to the crossed PVC frame via an aluminum channel and hose clamps.  The panel was provided with only two small mounting holes in its aluminum frame as it came out of the box.  The cross frame of PVC pipe and fittings is “screwed and glued to suit”, and braced outward from the mounting vertical at the bottom to the desired angle.

The spray head is at the right of the vertical.  The water supply comes up the inside of the pipe and operates at a reduced pressure of about 25psi when the timed valve in the “Control Box” opens.

The Control Box (below) contains the water timer, water valve and 12V voltage regulator for solar motor power. The voltage regulator is mounted in a metal box that has input connectors and monitoring test points for the panel output and regulator output. Needless to say – the watering components must not leak!  The Control Box cover is an inverted transparent storage box, held in place by an ingeniously padded and placed BRICK.  (Ahhhh, technology!)  The box will be mostly hidden by nearby daylily foliage.

Here’s to a successful project – so far anyway.  It has been fun, time consuming, and somewhat expensive. But Hey, it’s only Time and Money, right?  While we’re at it, no jokes about “rotating my crops” please – thank you!  Your other comments and questions  are welcome, however.

I tried to pick plants which would not grow out of bounds for their pots or become “viney” and entangled.  Time will tell if I succeeded

I am still thinking of ways it could be enhanced, such as having soft music coming from under the canvas top cover while the planter is rotating.  I would probably employ an iPod or MP3 player or equivalent with small auxiliary speaker(s).  Hopefully, it will also run from the solar source, so it would be good if it could run on 12V. I would like to have it play relaxing music with a garden or nature theme. It would have to resume playing after a power-down state.

Cheers,
Gardener Dave

Wednesday, June 2, 2010

Big Colorful Cannas by Gardener Dave


The Canna Lily is one flower that is frequently overlooked by Front Range gardeners. Perhaps the tropical nature of this showy plant gives pause to raising it in our climate of rapid temperature changes, or perhaps the stated need to dig them up in the fall and store them over winter intimidates many.
Cannas grow from large, starchy rhizomes. Interestingly, they are not true lilies, but are more closely related to gingers and bananas, hence the broad attractive leaves the plant produces. When the rhizomes dry, they may look dead, but will quickly revive and swell when water is applied to their soil.


I have minimized the care needed for growing my cannas by using the following method.  I plant them in a bed on the SE (front) side of my house
in enriched soil, water them well during the summer months, and let them go dry under about 5-6 inches of shredded bark mulch during the winter.  The minimal heat from the house foundation seems to keep them from freezing in the coldest winter so they are ready to come back up each spring. The brick wall of the house helps to stabilize temperatures during the summer, giving them more even warmth day and night. Being tropical, they do like warmth and moisture. They form a background for the shorter plants in the rest of my front flower bed, growing about 4-5 feet tall and produce showy blooms from late June to frost. My cannas are mostly rich basic reds, oranges and yellows, but many other colors – even variegated ones – are available. They do well with about 6-7 hours of sun, but will gladly take full sun. You have probably seen them used as tall, showy central plants in many public park gardens. I do dig mine up about every 3-4 years in the spring, then add more fertilizer and compost to the soil, divide them and usually have more roots than I need, so I share with friends.

Cannas also serve will as an upright “Thriller” in a large pot with other lower plants.  Make sure the pot is large enough and heavy enough so it will not tip in a strong wind.  Better yet, put the pot in a sunny place out of the wind to protect the large blooms. When the blooms fade, cut the stalk just below the spent bloom and the plant will produce more blooms. Keep the pot evenly watered and fertilize with a general-purpose fertilizer monthly to keep the blooms coming.

Cheers,
Gardener Dave

Saturday, May 15, 2010

Comments on Spring Rose Pruning by Gardener Dave

Just a couple of paragraphs, repeated from my blog posting of May 12th, 2009, “Spring Rose Pruning and Other Rosy Ramblings”:


1) Pruning: I DON’T try to save rose canes in the spring that are really dark in color or have “weather cankers” on them. They will almost NEVER support good roses later in the season, even if they have new sprouts on them. When you cut the canes back from the top, look for a healthy green cambium layer all the way around the cane down to the base, then stop pruning a bit above that point. This spring my roses will be severely pruned!

2) Pruning: I WAIT until late April or early May to prune the canes back. By that time you will have a pretty good idea of the extent of winter damage, and new sprouting growth will be evident. This last winter was hard on roses in our area, especially if they were exposed to below-zero temperatures and drying winds. In my first years of growing roses, I would prune canes back on mild days (during some of our “false springs” in February or March) only to prune them back some more after later cold spells. All right… I’ll admit that some years – such as this one – I just can’t stand the sight of ugly tall, brown, thorny canes, and I do lop them off early to improve the general appearance of the garden.

Cheers,
Gardener Dave

Thursday, May 13, 2010

Waiting for the (Real) Spring by Gardener Dave


Sometimes it takes so very long
for spring to come again
I check my tools and look outside
Will today bring snow or rain?

For when we like to plant and dig,
be Mother Nature’s child,
it seems the cold lasts much too long
“Will it ever just stay mild?”

Sometimes I say ”Spring’s finally sprung!”
and it will last this time
But then it comes and goes again
like my thoughts when making rhyme

One day in April it might come
It might last several days
Then winter’s cold takes o’er again
and mocks our foolish ways

May gives us so much promise
with sunny, balmy days
But even then it still might snow
and hide Sun’s warming rays

Now, if it snows In June this year
I’ll just take it in stride
Our altitude will get the blame,
and it won’t hurt my pride

We gardeners are a hardy lot
“Hope” is our middle name
You’ve got to be an optimist
to live with “false spring’s” pain

 Cheers,
Gardener Dave

Thursday, November 19, 2009

My House Has a Terrible Hangover! by Gardener Dave


During our last big weekend snow
my house went on a kind of spree
I looked up from my drive below
and RAN, before IT fell on me!

A monstrous load, a “gutter-bender”
I snapped one “pic” – then fear took over
“Move my car!  Don’t want crushed fender!”
My House Has a Terrible Hangover!

November weather has been wild
Record snow, then record warm
Acting like some mad, spoiled child
bent on doing folks some harm

Flooding, rain, more snow to plow
Monsoon storms in the Far East
“Normal” never happens now
Please! Can someone tame this beast?


Thursday, October 29, 2009

October’s Scary Themes by Gardener Dave


Here are three little Haikus to remind us
it’s Halloween time again.
Just in case you didn’t remember, ha!…

Toothy pumpkin grins
Ghosts and goblins everywhere
Halloween is here

Bedsheet ghosts abound
Kids in costumes on my porch
Trick or treaters rule!

Zombies beg for “brains”
Vampires search for toothsome necks
Chills run up my spine!

-----------------------------------------------------


Gardener’s have a few fall tasks to do to
prevent some of the “scariest” things that
otherwise might happen with winter cold.

1. Drain sprinkler systems and disconnect

garden hoses from faucets to prevent

frozen pipes – Expensive to repair!

2. Remove wet soil from clay or ceramic

outdoor pots to prevent freeze cracks
and other weather-related damage.
Keep them dry over winter.

3. Rake up leaves and litter from lawns to
lessen the chances of snow mold or other
diseases on the grass if snow cover persists.

4. Prune weak limbs from trees and shrubs
that might be broken by heavy snows.
Trunk bark may be damaged if limbs
fall and strip downward under the weight.

5. Lay in a supply of gritty sand to spread on
steps and sidewalks to prevent falls on ice.
Kitty litter can get yucky, and use of ice-melting
salts can damage nearby perennial plants.

By the way – we all know that Halloween starts
in September, Thanksgiving and Christmas start
in October or even MUCH earlier, right? At least
we do if we check out the stores!

Happy Holidays!

Gardener Dave

Friday, September 25, 2009

A Chronological Conundrum by Gardener Dave

A task remains for me to do

It happens every fall

For with the weathers changing scene

comes Standard Time’s recall


My quandary is, my earnest friends,

(this gives my brain a trial)

that I don’t have “no” outside clocks,

just a big, round, bronze SUNDIAL


I can change all my “inside clocks”,

(so many I can’t keep track)

To change a SUNDIAL’s not my thing

How do you set it back?


I could unbolt it at its base

and turn it “just a crack”

but then I think: “It will be cold,

and no one will keep track!”


For a SUNDIAL is a summer thing

like working in my garden

And I won’t need its sunny face,

(For this I beg its pardon)


Through winter months and early spring,

I can “hear” it through my window

“When are the people coming back

to read my pretty shadow?”


But then it will recall the poem

(the words still show their form)

It will take heart and carry on

through cold and icy storm


For on its disk the poem is thus

for everyone to see -

“Grow Old Along With Me -

The Best Is Yet To Be!”


Cheers,
Gardener Dave

Wednesday, September 16, 2009

Miscellaneous Mid-September Musings by Gardener Dave


Is it unrealistic to hope for an extended fall? Probably so, but we could have nice weather for another month and a half or so. After our cool, wet May-June and our turbulent July-August, I sure hope so!

I have two subjects today: One is about whether or not we can be totally objective about our own gardens, and the second des with some observations I’ve made while driving around the area..

Can we be objective with our own gardens?


As Master Gardeners, we are trained to advise the public about good gardening practices, plant selection and placement, and proper care. We do this with a professional eye and try to be very objective. We try to be helpful, but sometimes we don’t understand decisions made by clients.

But when it comes to our own gardens and yards, we may just let our objectivity slide a bit. We have our own foibles, it seems. We may become “emotionally attached” to a plant, especially if it has been part of our landscape for some time. It may seem almost part of our “family”, and we are reluctant to dispose of it, thinking if we give it another year or so, or treat it better, it will surely reward us. Not necessarily so. We may be ignoring the maxim of “right plant, in the right place” ourselves.

Our gardens and yards are not necessarily showplaces, but that’s all right, because they are primarily for our enjoyment, right? So what if the showiest gardens use lots of mass plantings and coordinated colors? So what if public gardens are all arranged with shorter plants in front and taller ones in back? So what if “professional” gardens have plants that bloom in succession from early spring to late fall? Our gardens are our own experimental labs, right? Well, at least mine is.

Oh, I try to put a little “eye candy” in front so people passing by might admire it. And I do try to have a few areas in back that I spruce up for guests that come for barbecues and parties. But, I admit I am many times guilty of buying plants just because “I never had one of those”, or because they are on sale later in the year, etc. These poor plants wind up being “plopped”, sometimes only because there is space that needs filling. It might not always be “right plant, right place”. So there! Now that I have “fessed up”, y’all come clean now. Have you ever done that?
Another human foible very familiar to me – Have you ever set out to accomplish a specific task (not necessarily gardening) and then get totally distracted by several other things that need doing “worse” than the one you set out to do? Happens to me all the time! I think I have figured out why it takes me so long to accomplish some things – it’s because I just never quite get to the first task on my list!

Some Neighborhood Observations

Since our early spring and summer provided plenty of moisture – little or no watering was done on many properties. This was fine for a while, but everyone needs to remember that it doesn’t reliably rain under house eaves and dense tree canopies, and when it goes dry again – as was true this year for most of August and so far into September – we need to turn the water back on. Even if the lawn is allowed to go dormant, the trees still need water.


One Questionable Quote I will always remember: “Trees don’t need to be watered, they get their water from the ground”. Hmmmm… how does the ground get water? They might be very surprised to learn that most of our trees have roots no deeper than 15-20 inches, and desperately need the water now. They might also be surprised to learn that the important feeder roots extend far beyond the leaf canopy on established trees – i.e. don’t water the trunk, guys! Many of our trees put out heavy leaf canopies this spring, and now seem more stressed than usual if they haven’t received irrigation. Trees are very valuable – let’s treat them like family members!

Cheers,

Gardener Dave

Tuesday, August 25, 2009

Hail Resistant Plants? by Gardener Dave


There are no hail-proof plants (cast iron plants?). There also may be no such thing as a “hail-resistant” plant. Their survivability depends on the severity of the hailstorm. Factors like hail size, hail-fall density, duration, accompanying wind and rain all enter into the damage equation.

I escaped the severe storm that wreaked havoc north and south on either side of Kipling St. on the night of July 20th, but my yard didn’t escape the swath of hail that crossed the eastern flank of Green Mountain on August 9th. It was not large hail and “microbursts” that caused damage in this area, but instead, relatively small hail a half inch and less with a high density that lasted around 15 minutes, along with strong NW wind and heavy rain.

After surveying damage the next day, I noted that some plants withstood the storm better than others. There were, as always in storms, areas that were protected to various degrees by house eaves, trees, etc. I am quite sure of the storm’s main direction, because my longish grass in the back yard was all lying down toward the S.E., and the hail came in 2-3 yards under my N.W.-facing back patio.

My trees seemed to take it quite well, although there were a lot of leaves on the ground. Perhaps the fact that the leaf canopies were very dense this year - due to a lot of available moisture - helped a lot. The majority of leaves on my front lawn and driveway were from my neighbor’s soft maple. My young redbud tree took it quite well, as did my linden and apple trees. Many leaves fell from my locust, but it still looks OK overall. Larger hail would doubtless have done much more tree damage.

Of course, all soft-tissue plants, such as begonias, impatience (including New Guinea), geraniums, and petunias were pretty well stripped. Also damaged heavily were daisies, coreopsis, black-eyed susans, and hostas. My canna lilies in front were spared, but only due to overhanging S.E. house eaves. I am not a vegetable gardener, but I can imagine how badly tomatoes, pumpkins, melons and most veggie plants must have suffered elsewhere.

Interestingly, my best survivors were the agastache, diascia, calibrachoa, (low) dianthus, most roses, ornamental grass, smoke bush, burning bush, astilbe, ivy (English), salvia, coneflower, and snapdragon. Peony leaves were badly scarred but intact otherwise. I am especially happy that my new Agastache ava and Agastache blue fortune, were still upright and blooming, just losing a few leaves. (The Agastache leaves do smell nice and “licorice-y” when ground up with the leaf vacuum though!)

Have we have seen the last of our summer hail? One never knows here. We just have to keep cleaning up and hope for a long, quiet, extended growing season the rest of this summer and fall !

Cheers,
Gardener Dave

Thursday, July 9, 2009

Calibrachoa by Gardener Dave


In the last 2-3 years I have been looking for a “petunia substitute” that would require less maintenance (esp. deadheading) than the ubiquitous petunia. I like petunias for their mass color effect and their fragrance, but I don’t like having to continually trim off spent blooms, and I don’t appreciate their somewhat sticky nature.

Ergo, I have been replacing petunias with Calibrachoa (a.k.a. “Callies”, “Million Bells”, “mini petunia”, etc.) both for bedding and use in pots on my deck. Their blooms are smaller than those of most petunias, but they come in many colors and are “self-cleaning”, so no deadheading! I will share my Calibrachoa experiences here with you and would welcome your own experiences and advice as well. They are still somewhat pricey and not as universally available as petunias, so extra care may be warranted to avoid having to replace/replant them if they don’t make it in your garden for one reason or another.


Firstly: some of the cultural advice I have read claims they are drought resistant. My experience tells me that here they need good well-drained soil and constant moisture, but avoid constantly wet soil. Curiously, if their little leaves begin to curl and wilt, the flowers may stay open and still be vividly colored, but the plant will not recover. Secondly: their stems are rather woody and thin and subject to breakage from handling and wind. I mulch them with shredded cedar bark and try to immobilize the longer stems to prevent wind whipping. Thirdly: they are much adored by slugs, so keep the slug bait handy! Some cultivars are more vigorous than others, some more creeping, some more wiry and bushy. Many are sold in hanging basket arrangements.

Other than those few concerns, I still like the “little fellers” for their generous sun-loving blooms from planting time to after light frosts in the fall, and for their clear bright colors and “enthusiasm” when you treat them right. Give them a shot of fertilizer now and then as you would petunias, and they don’t ask for much else (except no hail please!).

Curiosity overcame me, so I searched the net to see if I could find where their hard-to-remember and hard-to-spell name “Calibrachoa” came from. According to Marsh Botanic Gardens at Yale University, some botanists include them in the petunia’s genus, Solanaceae, and others separate them into their own Calibrachoa genus, named for an 19th century Mexican botanist and pharmacologist, “Antonio de Cali Bracho”.
The more modern version called “Million Bells” was developed by the large Japanese corporation, Suntory (Yes, they also make whiskey) Interesting!

More info on them, including care and even their propagation, can be found at the following site:

gpnmag.com

Cheers,
Gardener Dave

Monday, June 29, 2009

Pots “R” Us (In special places) by Gardener Dave


There were a couple of problem areas in my yard where nothing seemed to grow well. I didn’t want to put a lot of work into them for reasons which I will explain. One location is in a far corner with a utility pole in it. The grade there is already a bit higher than my neighbor’s and would require a preliminary dig-out to put in a raised bed so as not to harm the fence. However, I kind of like the way my yard slopes gently up to that stage-like corner. The other reason for not putting in an extensive/expensive raised planter bed there - the plants would get pretty well destroyed if the “Power to the People” (Xcel) crew decided that major work is needed up the transformer pole, or (heaven forbid) the pole needs replacing. Since the corner was slightly elevated, I decided to put some “characters” on my little stage in the form of graduated-size terracotta pots. These I plant with annuals each spring. This year I put a row of Calibrachoas in front of the pots. The pots are filled with moisture-retaining potting soil and everything is watered by drip irrigation so maintenance is pretty much just fertilizing and a bit of deadheading. In the late fall I remove the annuals, let the pots go dry, and cover them with plastic to keep the soil dry so it doesn’t expand and crack the pots. If the Power People need to work there, at least they won’t be destroying perennials or an elaborate raised bed, and the pots can be moved.


The other problem area was below my deck in one end of a brick planter that was built at the same time as the house. It gets no direct sun. The light source there is primarily reflected light off the concrete driveway. This seems to be adequate for Impatiens and a few other shade plants. It looked bad, so I decided to give it the “graduated size pot treatment” also. There was room for only three “sized” pots, which I planted with New Guinea Impatiens, “Can Can” Coral Bells (Heuchera ‘Can Can’), and a “Little Lantern” Ligularia (Ligularia x hessei ‘Laternchen’) which I have not tried before. So far they all seem to be happy there. I wish I had a “before” picture to show you, as it’s like the expression “You Had to be There” to see what it was like originally, with Oregon Grape Holly trying to extend itself into those shady conditions from the middle of the planter. It got tall and lanky and very weedy-looking. Needless to say, it is no longer there. Good riddance!

Cheers,
Gardener Dave
 

blogger templates | Blogger